 |
| The defender sets up around an objective marker. |
Once again this week we got together to pursue our creation and playtest of the Campaign Rules for Flint and Feather. Things are going well and all the players are very happy with how the game is running. We are just ironing out things that come up as we play and trying to cover all the bases. For instance in this evenings play we rolled a new scenario, picking and choosing to try the ones we have not playtested yet. Please note, a couple of the scenarios we have played multiple times. As stated we wanted to try something new so we put together a Defense scenario. This is designed for one a player who is on a Forage Order challenges a player which is on a Rest Order. So it is intended as a surprise attack against warriors working in the field or some such. Not necessarily in a fortified village which is the Assault Scenario that is mentioned earlier in this blog.
 |
| A War-bearer captures an unprotected Objective Marker |
 |
| Archers trade fire. |
 |
| Defenders leave a marker uncovered to better shoot at their opponents |
 |
| Advancing through the crevice gap. |
The Defender is given three objective points to defend. These represent, supplies or tools or some other implements that are worth keeping. The defender places two of these markers and the attacker places one. No marker is allowed to be withing 12" of another marker. The defender also gets 6" of defensive works, like boulders or logs that can be placed at will within 3" of any of the objectives. The defender can also choose to leave any objectives undefended and in our game he did leave one undefended.
The difference between an Objective Marker and a Furs Marker is keen. The objective Marker must be picked up by an Attacking figure and carried off the board in order for that objective to be achieved. The defender cannot move the markers. The winner is the player that ends the game with more Objective Markers than his opponent.
In our particular game the defender choose to protect two of the three markers and leave one uncovered. The Attacker promptly moved a War-bearer up the steep mountain spine in order to collect the closest Objective Marker. However, he had difficulty getting the marker back down on the cliff. As the game progressed the player ran into activation problems and the War-bearer spent several actions "collecting" the Objective Marker.
One of the things that has been noted in this playtesting is the importance of leaders to activate groups in this game. Several players have tried to divide Warbands into four and even five groups, sending separate figures out to "collect" Furs Markers or achieve objectives only to find these figures stuck for turn after turn failing to activate.
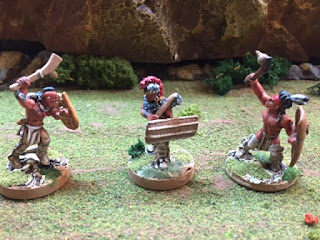
The game we were playing devolved into two different battles on either half of the board. Archers traded fire across the cliffs on the right half of the board while on the left side the Attacker advanced through a crevice in the terrain only to be met by the Defender who sallied with his melee armed warriors to beat off the advance of the Attacker.
The Attacking player got the first charge in and both groups led by Companions met each other. The Attacker won the first fight and wounded the Defending Companion. However the defender only failed his Nerve Test by one and only had to back away a walk move. He was ready to strike on his next activation. However, first he softened up the attacking group with some well placed bow fire. Then as a reaction he charged his opponent.
 |
| Another view of the Attackers advance with the lone War-bearer seen collecting an Objective Marker at the top of the spire. |
|
The final melee was a victory for the Defenders. They knocked the Attacking Companion down and caused a Deep Wound on him. The player failed the post combat Nerve Test and the two War-bearers fled leaving the downed Companion to be captured. The Companion was promptly trussed up and carried home to be left to the whims of the tribe. The Stripling that caused the telling wound was promoted to a War-bearer and becomes a Named Warrior for the Defending players.
 |
| Attackers and Defenders clash |
 |
| Counterattack |
In the Campaign game the only figures you track for your warband are the Key Characters and Named Characters. This has elevated the importance of Striplings as they are the only figures that can become Named Warriors and progress to Veteran Warriors and get enhanced Attributes and equipment. Of course the Great Warrrior and Companion may also improve. Also the only figures that you are assured of having with you each game are the Great Warrior, Companion and up to three Striplings. Striplings may also choose to become Healers or Shamans which gives you a Named Warrior of this type in your Warband which can now grow in attributes and equipment as the Campaign progresses.
The final resolution of the game was a 5 War! Dice to 4 War! Dice victory for the defender. Not a bad result except the Attacker lost his Companion and needs to create a new Companion for his Great Warrior. One would think this would also affect his ability to convince the Council in the upcoming Campaign turn. We will see...


Comments
Post a Comment